General area checklists might feel like compliance — but they rarely deliver clarity or control.
In open-cut mining, where hazard visibility is critical, ticking a box for an entire dig block can give you the illusion of safety while missing the details that truly matter.
The Problem with Generalised Hazard Reporting
A typical checklist might include something like:
“Hazard XYZ fresh ravelling in Block X”
At face value, that sounds like risk is being managed. But this kind of summary lacks crucial context:
- Where exactly is the raveling?
- How far from the bund line or active work area?
- Has it been photographed or rated for severity?
- What controls have been applied or escalated?
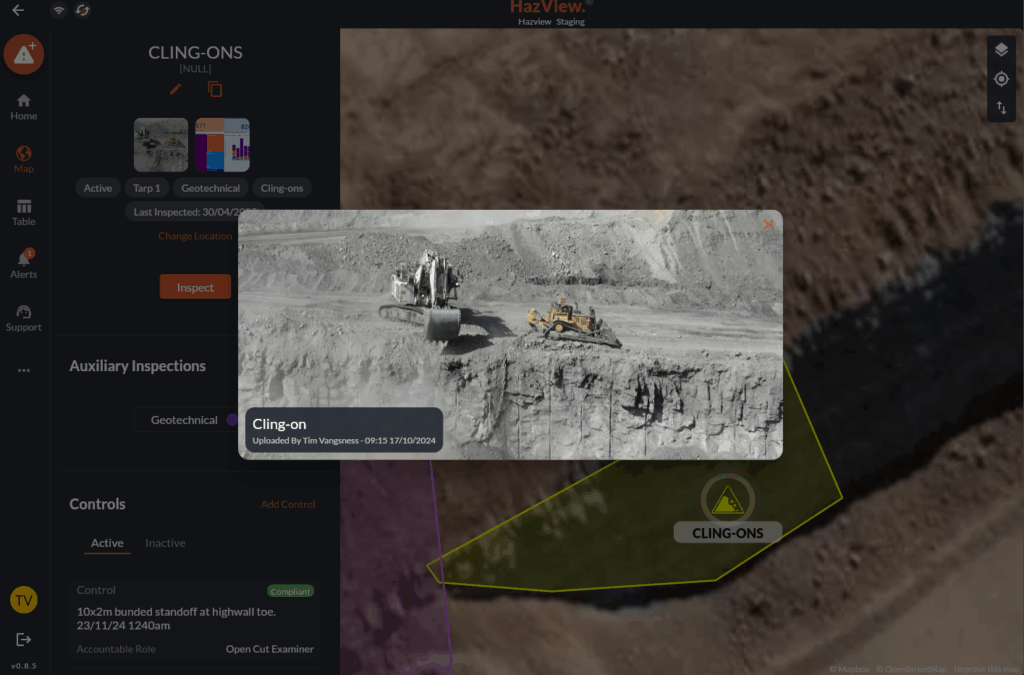
Now multiply that uncertainty across a 2km long highwall, and the risk compounds fast. Saying “cling-on identified” somewhere along that wall? It’s not just vague — it’s dangerous.
The Case for Mapped Hazards
At HazView, we take a different approach. Our system logs hazards by exact location, supported by:
- 📍 GPS-coordinates or mapped zones
- 📸 Field photos and media
- 🛠️ Applied controls
- 📊 Custom severity ratings and escalation triggers (like TARPs)
That means when something’s wrong, you don’t just get a vague line in a spreadsheet — you get a visual target that drives action.
Why It Matters
Hazard visibility isn’t just about compliance — it’s about stopping incidents before they happen. A checklist gives you a “clear” box. A mapped hazard gives you a reason to stop and intervene.
When safety depends on precision, “Block X” isn’t good enough.
HazView helps you shift from guesswork to ground truth.